All Companies
1.1 Purpose
The main purpose of this module is to enable the administrator to manage All Companies in the portal. Admin will be able to add, update, and delete the All Companies in the portal.
1.2 Navigation Path
Path: Users Accounts > All Companies

1.3 Listing Screen
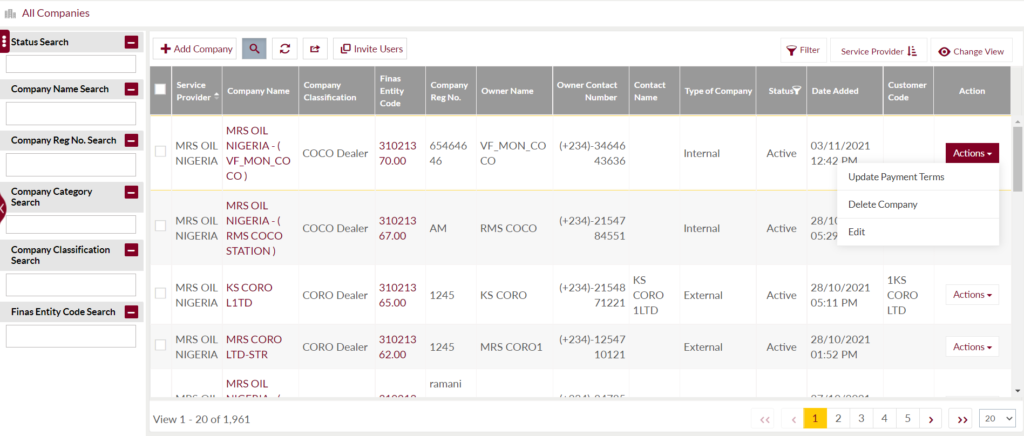
View list of all the Companies that were previously added by the Administrator. Admin will have an option to add and update the Companies. Admin will be able to search the Companies using the filter option that is provided on the list. Admin can view the listing in two views; admin will have the option to change the view by clicking on “Change view” Button.
Table view

Grid View

Sorting: Admin can sort the list by Company Name, Owner Name, Contact Name, Status, Added by, Date Added, Short Name..

Text Search Filter: Admin can search from the list using the text inputs provided below.

Filter: Admin can filter the listing using Status Search, Company Name, Company Reg No., company category search, Company Classification Search, Finas Entity Code Search.

Option to Conditional search, refresh, export and Invite Users
Conditional Search/Filter: User will be able to search using below pop-up

- Admin will be able to search conditionally i.e. the search must satisfy the conditions “Any” or “All” based on the selection

- Multiple Field conditions can be added by clicking on “+” Button
- Field conditions can be removed by clicking on “-” Button
- Admin will have the option to select which field the input data needs to be compared and searched upon

- Criteria needs to be set to compared with inputted data text input. List of Criteria are mentioned below:

- The text area will be provided to enter the data for comparison and search in the listing.
Export
- Admin will have the option to export data in excel and PDF format
- Admin can either select the columns or all the columns based on the need
- Admin can either export the current page records or all the record

Add New Company: To add Company, click on the “Add Company” button.
1.4 View Company Details
View Summary details of the Company

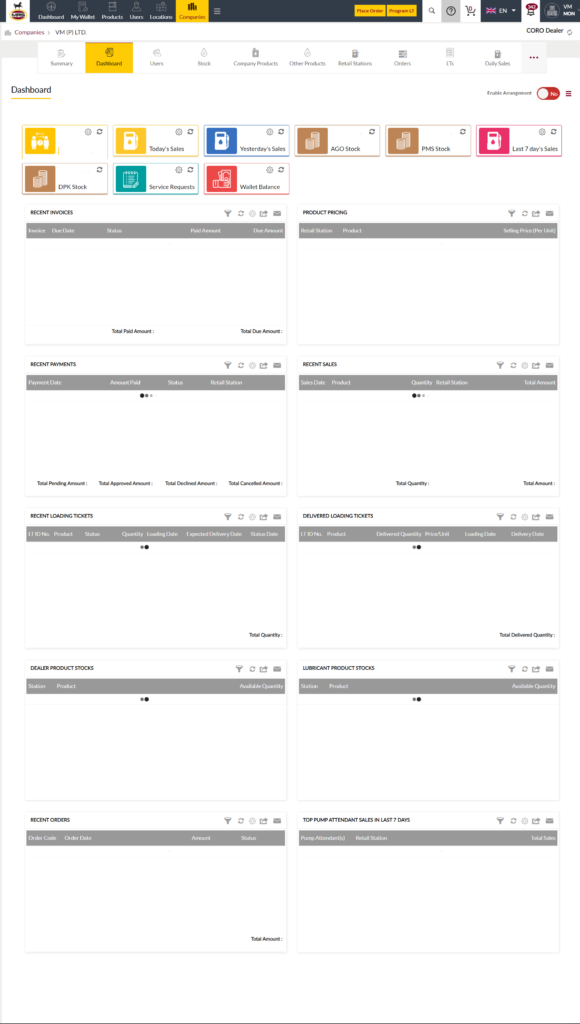
View Dashboard: View the graphical data related to sales, product stock, wallet balance, service requests, invoices, pricing, payments, recent orders, loading tickets. Data is available in tabular form.
View Users: View list of users who belong to the company and are added in the portal. Admin has an option to add new company users in the system.

- Add Users: Admin will be able to add the user account from the company view as well. A Pop-up will appear where an admin needs to fill the user data and on submitting the form, a user account will be created.

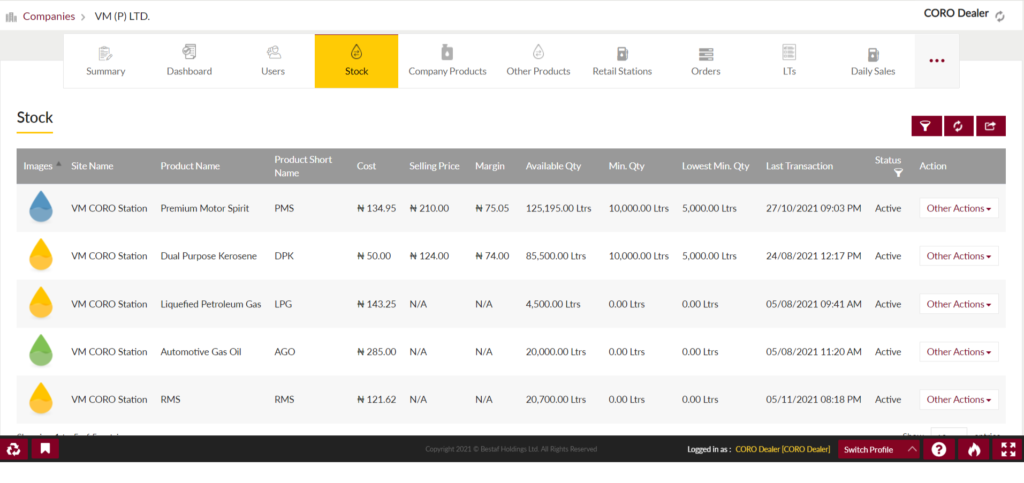
Stock: Listing of all the white product stock with all the details as mentioned in the below screenshot. User can also update the selling price by clicking on other actions drop down.
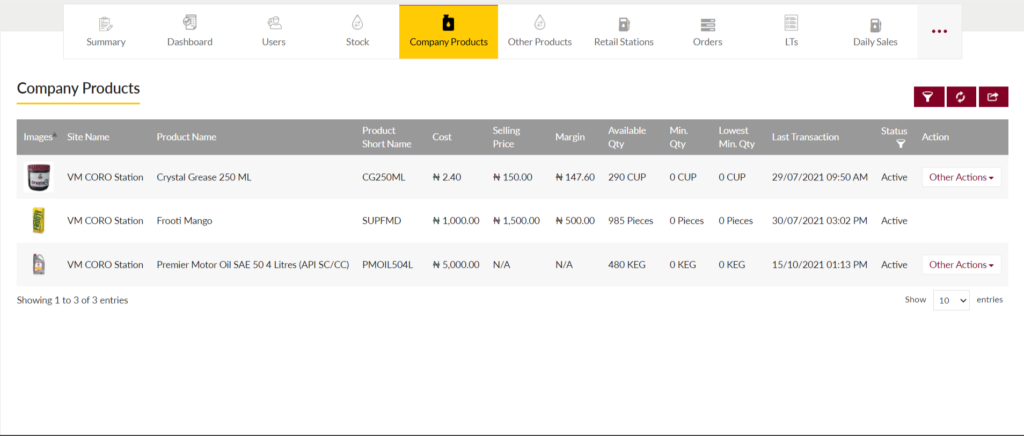
Company Products: View list of Products of the company. Products will be managed by the company’s management. Admin will be able to search and filter in the portal
Other Products: View all the other products that are for sale at the retail station. Listing of the products is available as shown in the below screen.

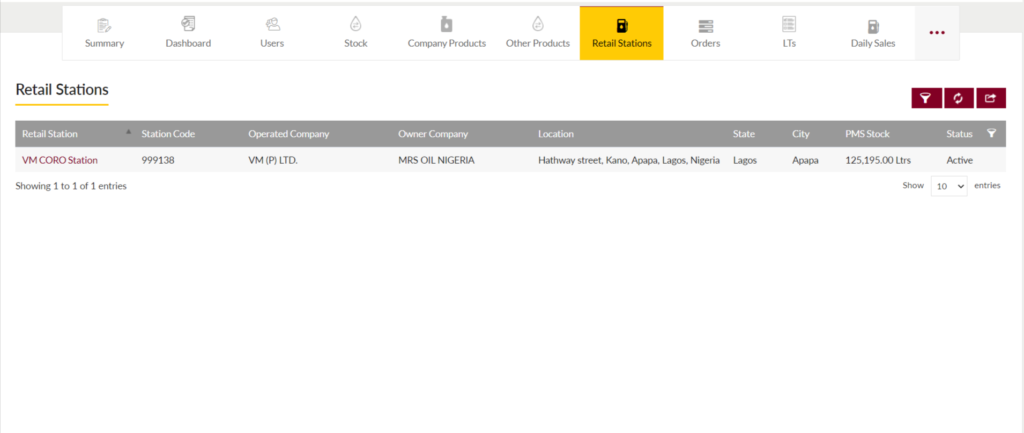
Retail Stations: View all the retail stations added by the dealer. Relevant retail station details are available in the listing.
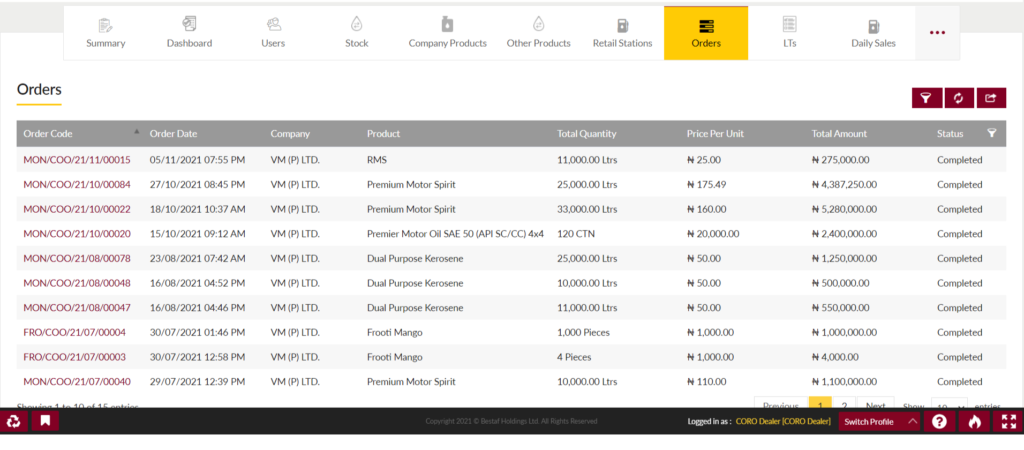
Orders: View the list of all the orders placed by the dealer. Orders listing contain all the major order details. Status of the orders is also maintained in the listing.
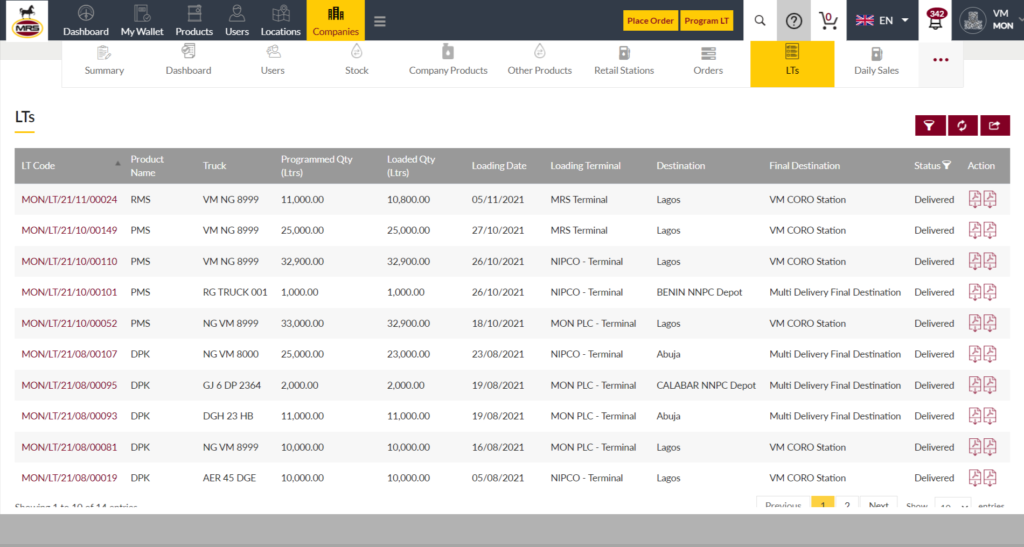
Loading Tickets(LTs): View all the loading tickets programmed by the dealer. LTs listing has all the details in the columns and LT & Waybill attachment is also in the listing.
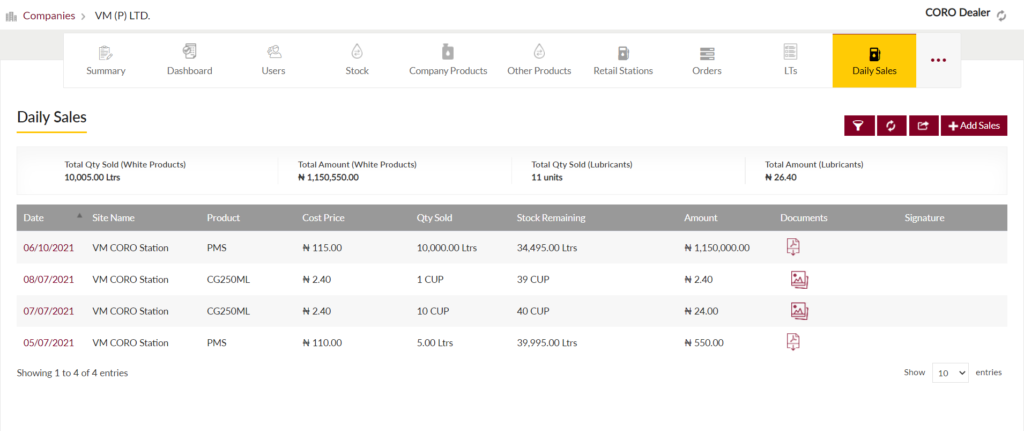
Daily Sales: View the sales of the products done on daily basis. The sales includes white product, lubricants, other products sales.
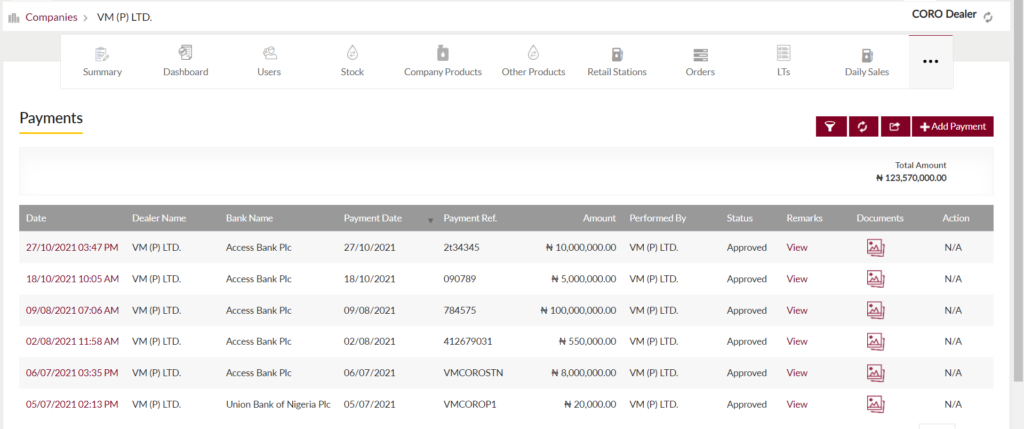
Payments: Listing of all the payments done by the dealer is available under the payments tab. Dealer can also add new payment using the Add Payment button.
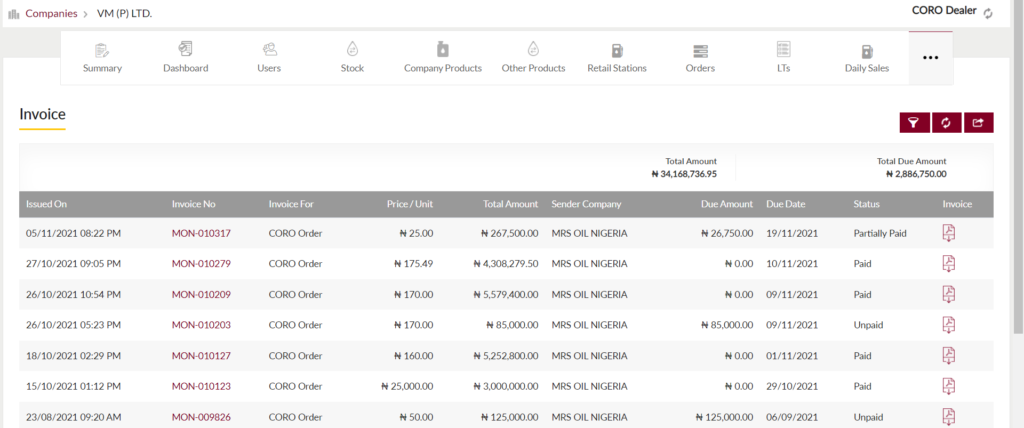
Invoice: View all the invoices generated for the orders delivered to the dealer. Dealer can also see total invoice amount and due invoice amount with the invoice attachments in the listing.
View Documents: View a list of documents uploaded by the company’s management. Admin will be able to search documents by date in the portal.

Option to View recent activities done for the company.

1.5 Add New Company Form
- Admin will be able to add a new company from this page
- Admin needs to fill the Company information to add a new company in the system.
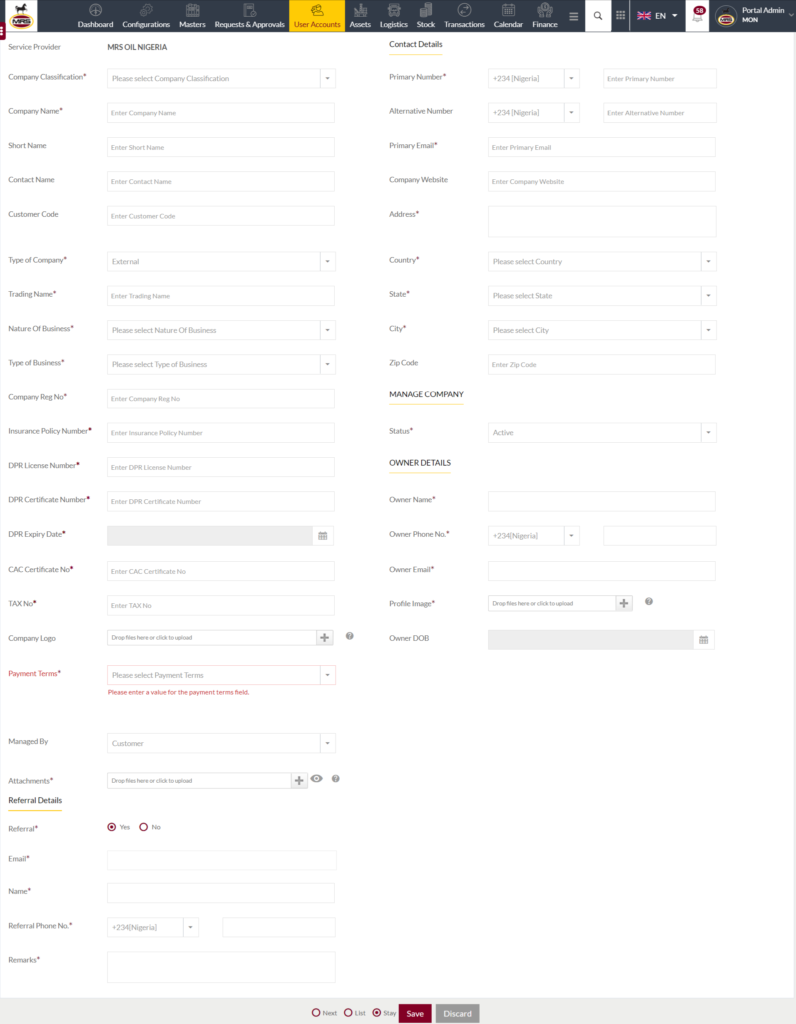
Fields available in the Add User Account Form
- Company Classification (Required): Select the Company Classification from the dropdown list.
- Company Name (Required): Enter the Name of the company in text input.

- Short Name: Enter the Short Name of the Company in text input.
- Contact Name: Enter the Contact Name of the person belonging to the Company in text input.
- Customer Code: Enter the Customer Code of the Company in text input.
- Type of Company (Required): Select the type of company from the dropdown list.
- Trading Name (Required): Enter the Trading Name of the Company in text input.
- Nature Of Business (Required): Select the nature of the business from the dropdown list.
- Type of Business (Required): Select the type of Business from the dropdown list.
- Company Reg No (Required): Enter the Registration Number of the Company in text input.
- Insurance Policy Number (Required): Enter the Insurance Policy Number of the Company in text input.
- DPR License Number: Enter the DPR License Number of the Company in text input.
- DPR Certificate Number: Enter the DPR Certificate Number of the Company in text input.
- DPR Expiry Date: Select the DPR expiry date from the calendar.
- CAC Certificate No (Required): Enter CAC Certificate Number in the text input.
- Tax No. (Required): Enter the Tax Number in the text input.
- Company Logo: Upload the company logo.
- Payment terms: Admin need to select the payment term from the dropdown list
- Managed By: Select if the account is managed by Customer or Supplier
Contact details
- Primary Number (Required): Select the ISD Code from the dropdown list and enter the phone number.
- Alternative Number: Select the ISD Code from the dropdown list and enter the alternative number.
- Email (Required): Enter the Email ID of the User in text input.
- Company Website: Enter Website of the company in the text input
- Address (Required): Enter the Address of the company in the text area.
- Country (Required): Select the country of the company from the dropdown list
- State (Required): The dropdown of the State will be populated based on the Country Selected. Select the state of the company from the dropdown list.
- City (Required): The dropdown of the City will be populated based on the State Selected. Select the City of the company from the dropdown list.
- Zip Code: Enter the Zip code of the company in the text input.
Manage Company
- Status: Set the status of the company from the dropdown list – Active or Inactive
Owner Details:
- Owner Name (Required): Enter the Owner Name of the Company in text input.
- Owner Phone No. (Required): Select the ISD Code from the dropdown list and enter the phone number.
- Owner Email (Required): Enter the Email ID of the Owner in text input.
- Profile Image (Required): Upload the profile image of the owner.
- Owner DOB: Select the owner DOB from the calendar
Referral Details
- Referral (Required): Select “Yes” if the company is referred by any contact. Select “No”, if no referral
Enter Referral details (if admin selects referral is “Yes”, user need to enter the details of the referral.
- Email (Required): Enter the Email ID of the Referral in text input.
- Name (Required): Enter the Name of the referral in text input.
- Referral Phone No. (Required): Select the ISD Code from the dropdown list and enter the referral phone number.
- Attachments (Required): Upload attachment for the referral.
- Remarks (Required): Enter the remark in the text area provided.
Note: There will not be any Edit functionality in the all company module.
1.5.1 Edit & Update Company Form
Below are the options to edit company details:-
Update payment terms using below screen:-

- User need to select from Payment terms drop down.
- Add remarks.
- Attachments if any.
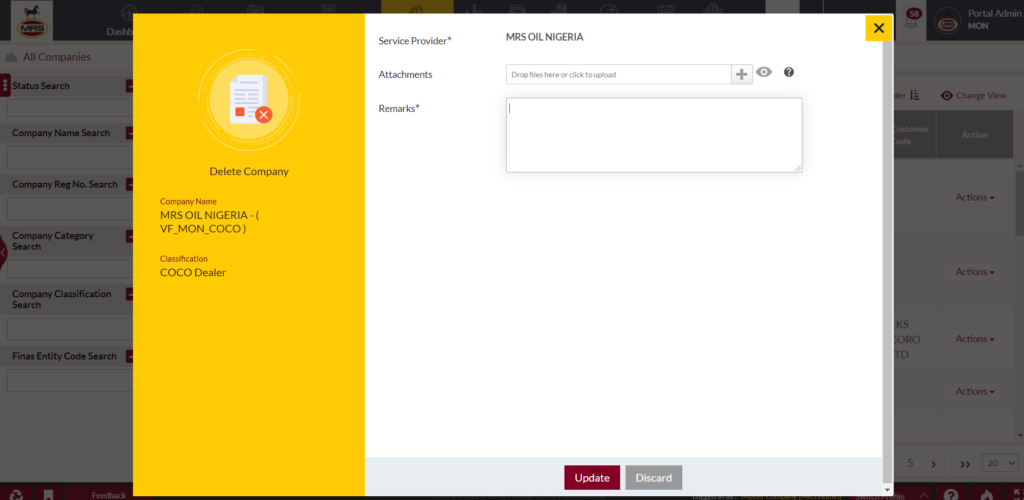
Delete company using below screen:-
Edit company form using below screen:-
1.5.2 Company Classification
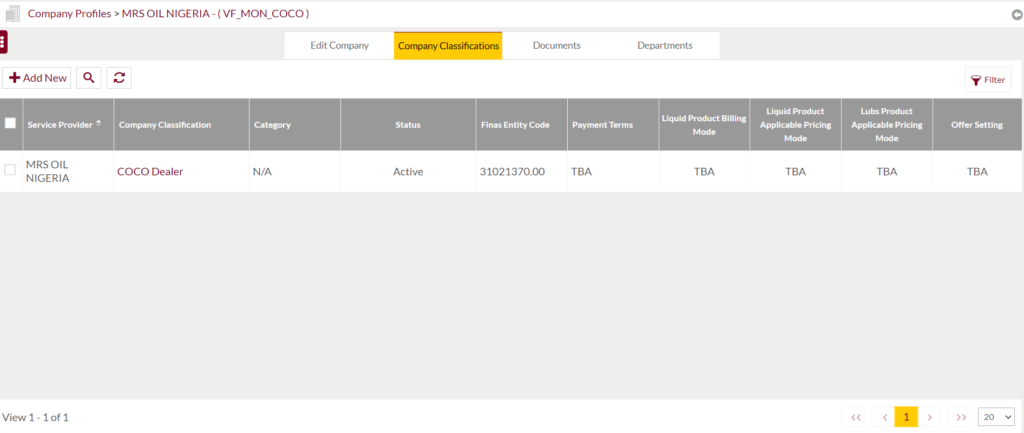
- Add Company Classification
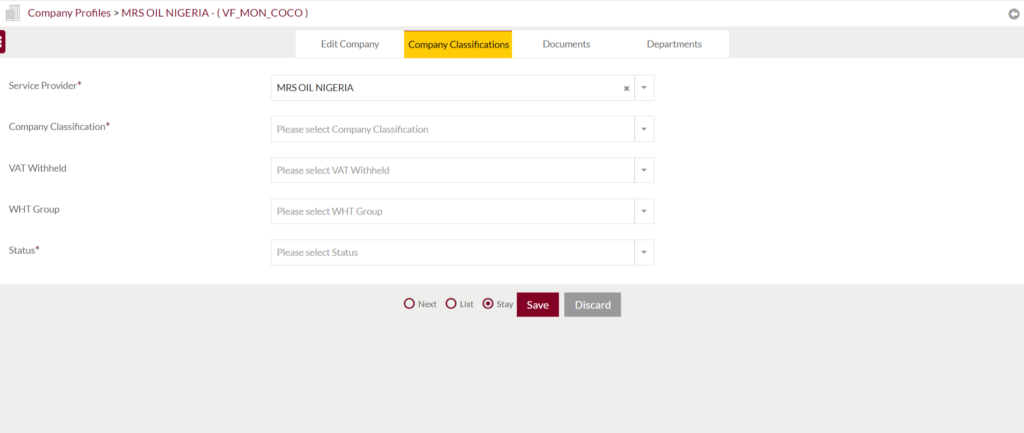
- Service Provider is the company under which classification is created.
- Company Classification is to be selected from the drop down list.
- VAT Withheld is to be selected if VAT is applicable or not.
- VAT Group is to be selected from the drop down list. Whichever group is applicable.
- Status is to be selected from the drop down for the company which is been classified.
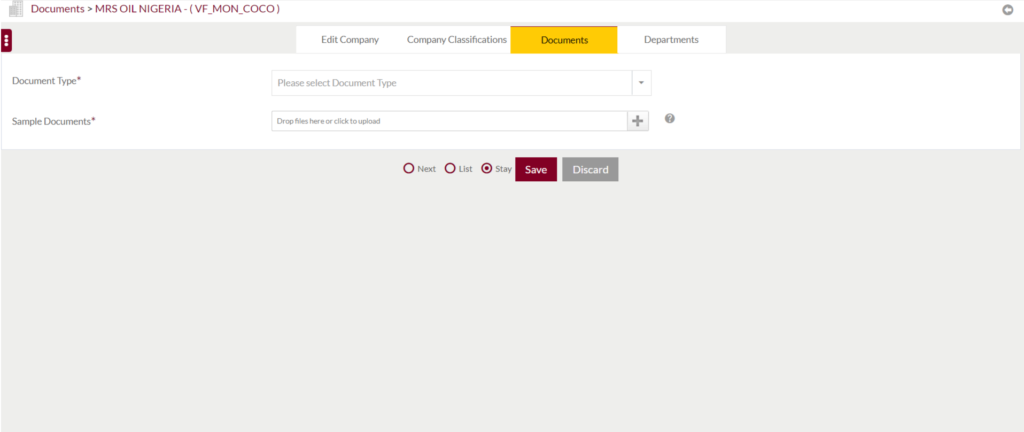
1.5.3 Company Documents
- Listing of company documents uploaded
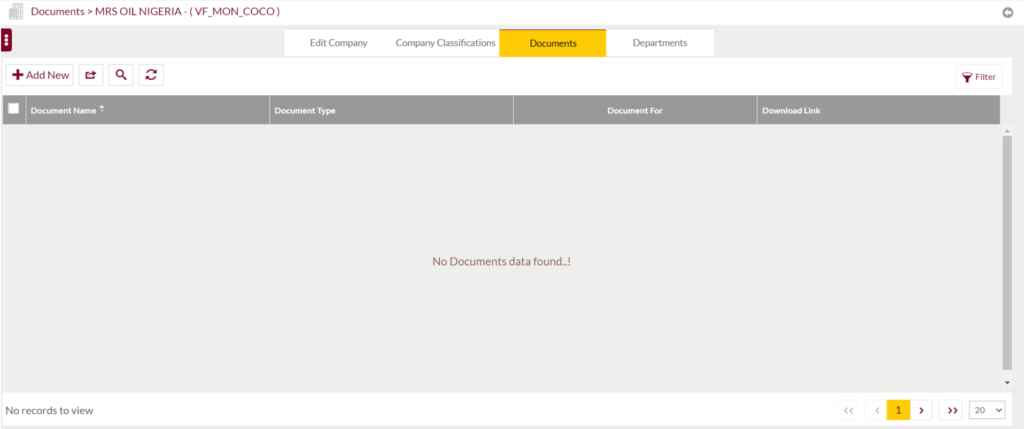
- Add Company Documents.
1.5.4 Company Departments
- Company Department Listing.
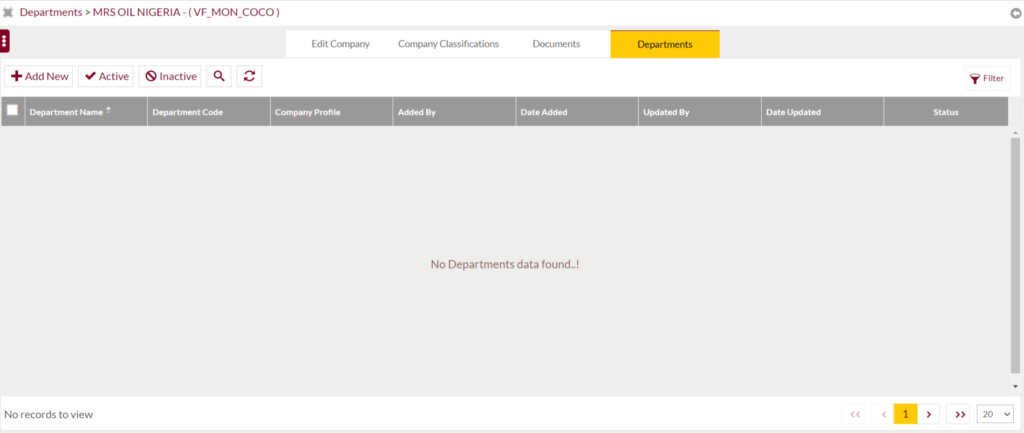
- Add company department
