Jetty
Purpose
The main purpose of this module is to enable the administrator to manage the Jetties that available with the company. This module is the master for Jetties that will be frequent used in the system. Admin will be able to add, update and change the status of the Jetty using this system
Navigation Path
Path: Assets > Jetty

Listing Screen
View list of all the Jetties that were previously added by the Administrator. Admin will have an option to add, update, and activate/deactivate the Jetties. Admin will be able to search the Jetties using the filter option this is provided in the list.

Search Filter: Admin can search from the list using the text inputs provided below.

Option to search, refresh and export

Conditional Search/Filter: User will be able to search using below pop-up.
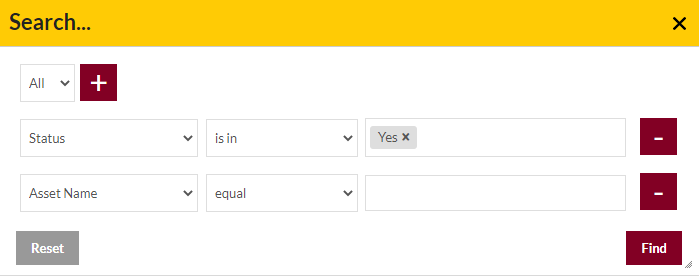
- User will be able to search conditionally i.e. the search must satisfy the conditions “Any” or “All” based on the selection

- Multiple Field conditions can be added by clicking on “+” Button
- Field conditions can be removed by clicking on “-” Button
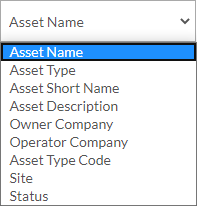
- Admin will have the option to select which field the input data needs to be compared and searched upon
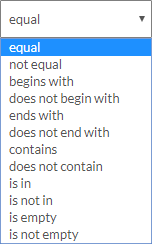
- Criteria needs to be set to compared with inputted data text input. List of Criteria are mentioned below:
- Text area will be provided to enter the data for compare and search in the listing.
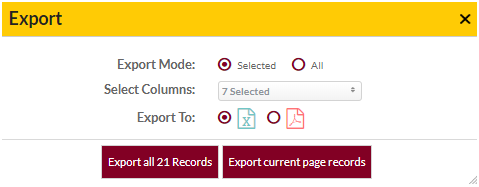
Export
- Admin will have the option to export the daily sales in excel and PDF format
- Admin can either select the columns or all the columns based on the need
- Admin can either export the current page records or all the record
Add New Jetties: To add Jetties, click on the “Add Asset” button
Add New Jetty Form
- User will be able to Add the Jetties from this page
- The user needs to fill the Jetty information to add the Jetties in the system.
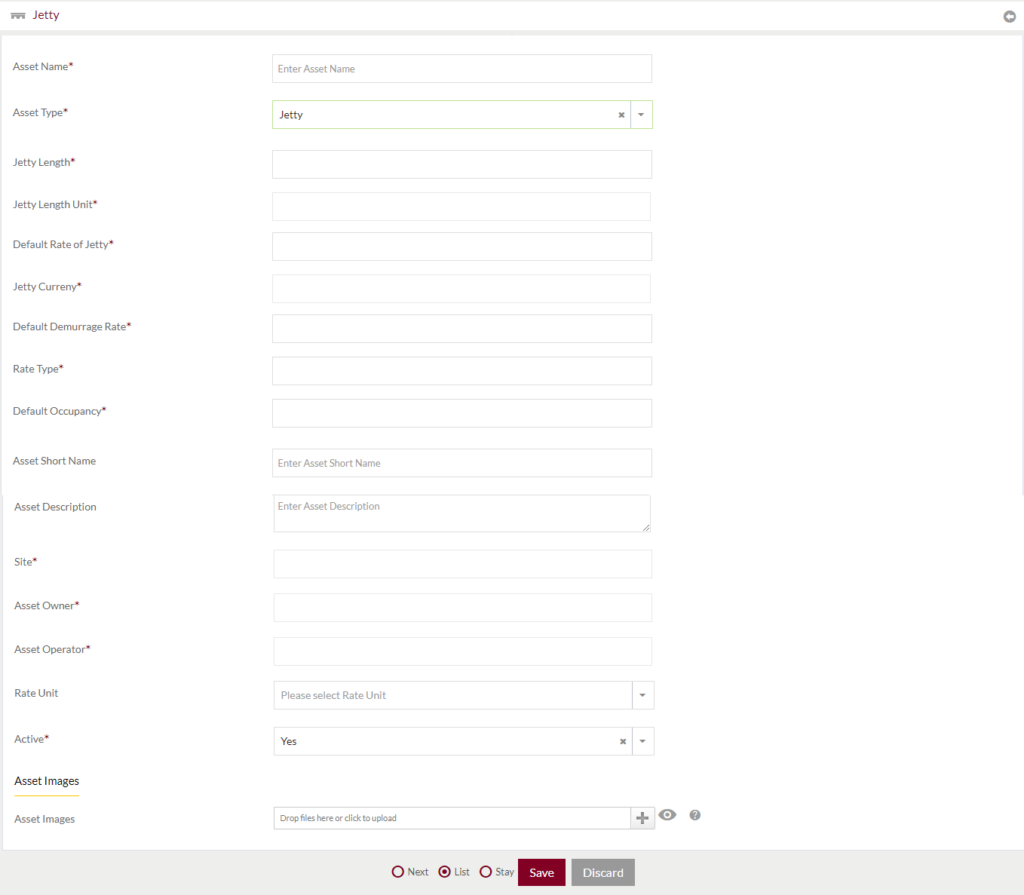
Fields available in the Add Jetty Form
- Asset Name (Required): Enter the name of the asset in the text box
- Asset Type (Required): Type of the asset will be selected “Jetty” by default
- Jetty Length (Required): Enter the length of Jetty in the textbox
- Jetty Length Unit (Required): Enter the Length Unit of the Jetty
- Default Rate of Jetty (Required): Enter the default rate of the Jetty.
- Jetty Currency (Required): Enter the currency used Jetty
- Default Demurrage Rate (Required): Enter the Default Demurrage Rate of the Jetty.
- Rate Type (Required): Enter the Rate type of the Jetty.
- Default Occupancy (Required): Enter the Default Occupancy of the Farm.
- Asset Short Name: Enter the short Name of the Jetty
- Asset Description: Enter Description of the Jetty
- Site (Required): Enter the site name of the Jetty
- Asset Owner (Required): Enter the owner of the Jetty (asset).
- Asset Operator (Required): Enter the operator of the Jetty (asset)
- Rate Unit: Select the rate unit of the Jetty
- Active (Require): Select if the Jetty is active or not.
- Asset Image: Upload the image of the Jetty (Asset)
Before Submission, admin will have option to go to “Next” Page to add new Jetty, go to “listing” or “Stay” on the same Jetty page.
Admin can save the Jetty by submitting the form or can discard the Jetty.
On Submission, the Jetty will be listed in the Jetty listing page.
Edit Existing Jetty
- User will be able to Update the Jetties from this page
- The user needs to fill the updated Jetty information to edit the Jetties in the system.
- User will be having 2 tabs to edit Jetty information
Edit Assets: It is similar to the Add Jetty form. Admin can update the details of the Jetty
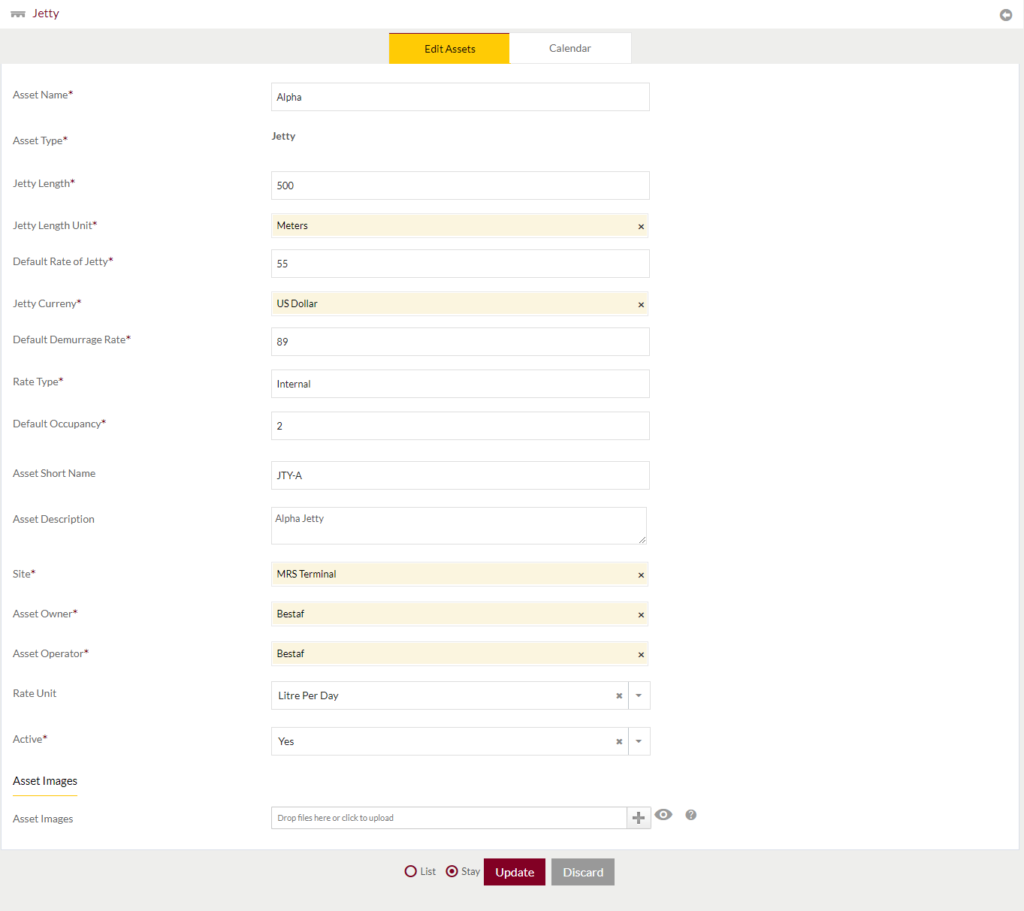
Admin will be able to update the details by submitting the form
Before Submission, admin will have option to go to “listing” or “Stay” on the same Jetty page.
Admin can update the Jetty by submitting the form or can discard the Jetty.
On Submission, the Jetty will be listed in the Jetty listing page.
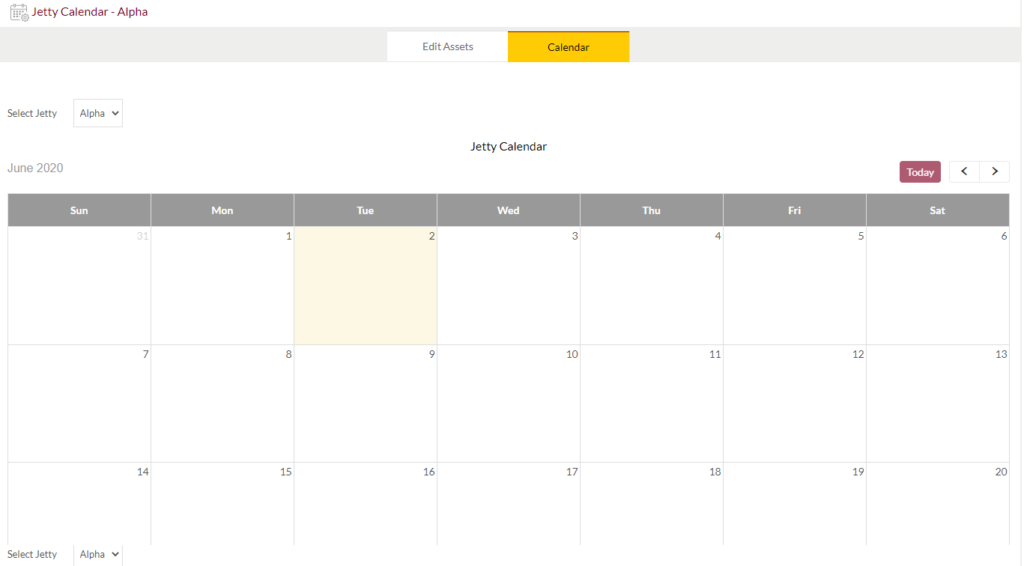
Calendar: View the dates on which the vessel will be alongside the jetty for throughput in the calendar provided in the system.