OTHER SUPPLIER PRODUCT ORDER PROCESSING
1.0 Purpose
The main purpose of this process is to deliver the other supplier product orders processing from the supplier system to portal system.
1.1 Who can place other supplier product orders
- RORO Dealers
- CORO Dealers
- COCO Dealers
- Independent Dealers
- Distributor and Resellers
- CC Team on behalf of Customers
- MRS Admin on behalf of Customers
1.2 Navigation Path for Customers
- Transactions Menu > Place Order Menu Item
- Place Order button in header menu
1.3 Different Applications Involved in Process
- Portal Web
- Portal Customer App
- Supplier System
- Supplier Mobile App
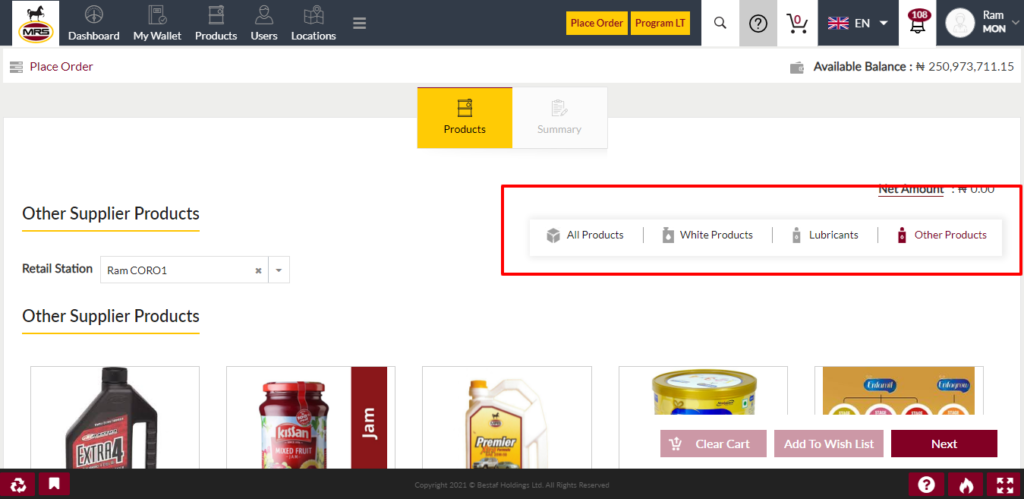
1.4 Filtering the Other Supplier Products from list of products
In place order page it shows all the products which are applicable to the logged in user or selected customer by CC team or MRS Admin. In place order page user can filter the other supplier products using the product type filer.
| Page/Screen | Place Order |
| Application | Portal Web |
| Role | RORO Dealer, CORO Dealer, COCO Dealer, ID, D&R |
| Page/Screen | Place Order |
| Application | Portal Customer App |
| Role | RORO Dealer, CORO Dealer, COCO Dealer, ID, D&R |
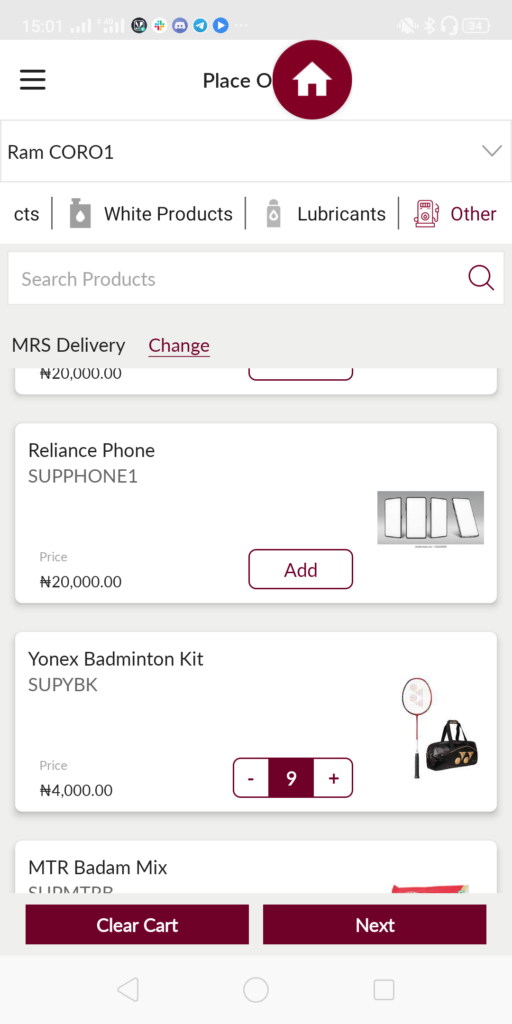
1.5 Adding Products to the Cart
From place order page users can add the required products into the cart by clicking on the add to cart button. After adding the products into the cart by clicking on the next button user moves to the order summary page to display all the product details with the product prices details.
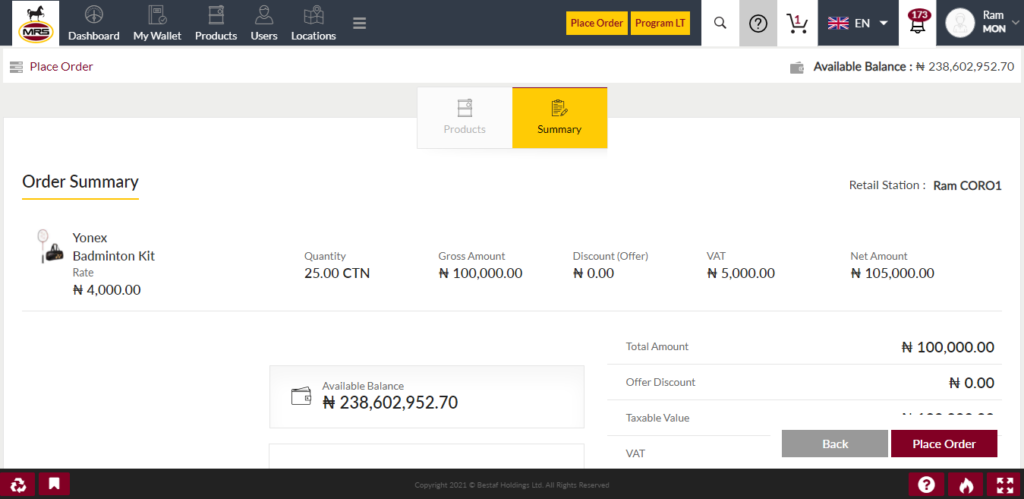
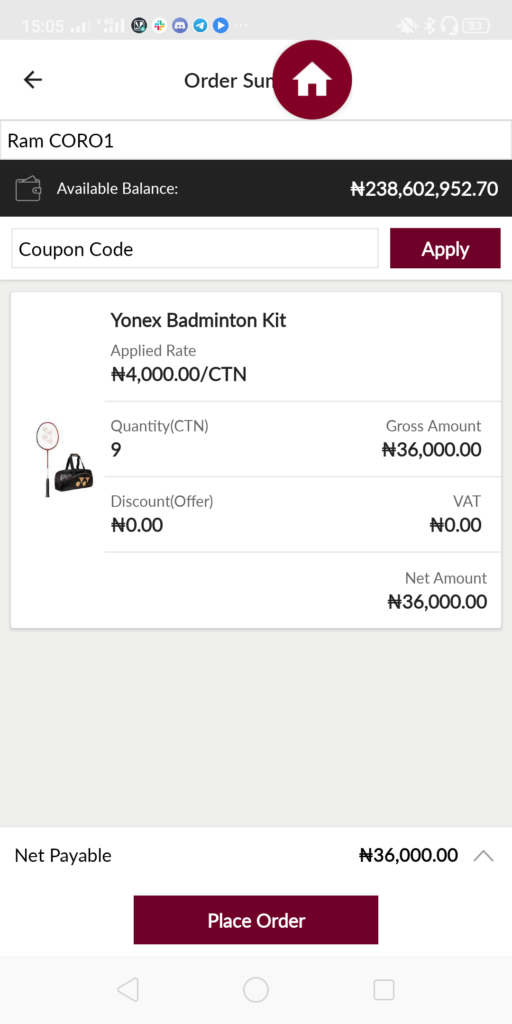
1.6 Placing Other Supplier Product Order
In order summary page user will review all the products which are added into the cart and by clicking on the place order button system places an order with the added products and the same order will be synced to the supplier system. Before placing the order system will check whether the customer’s wallet is having sufficient amount or not. If the wallet is not having sufficient funds then system will not allow user to place the order. If the amount is available then system places an order.
| Page/Screen | Place Order Summary |
| Application | Portal Web |
| Role | RORO Dealer, CORO Dealer, COCO Dealer, ID, D&R |
| Page/Screen | Place Order Summary |
| Application | Portal Customer App |
| Role | RORO Dealer, CORO Dealer, COCO Dealer, ID, D&R |
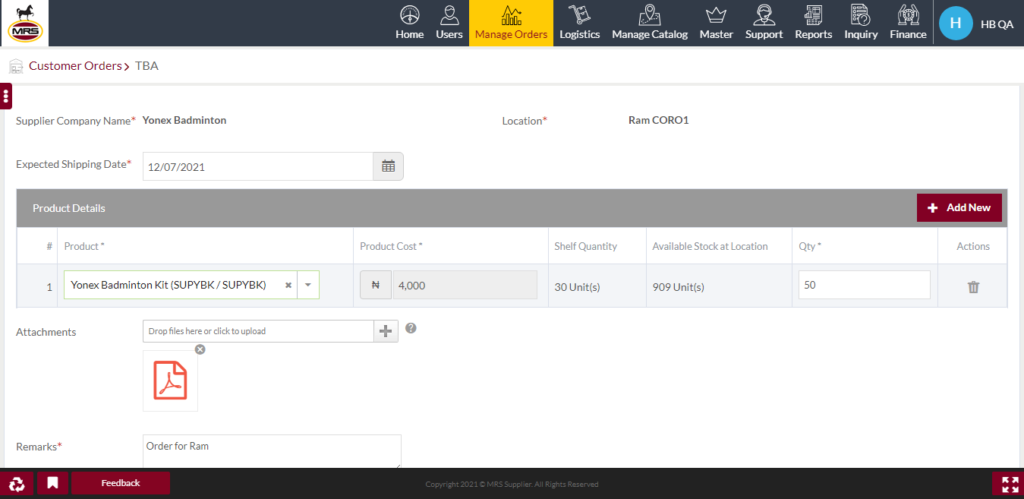
1.7 Placing Other Supplier Product Orders By Supplier
From supplier system also suppliers can place orders for the stations on behalf of the customers. Once the supplier placing the order then that order will be synced to the portal and then order code will be returned back to the supplier system.
Navigation Path – Manage Orders > Customer Orders > Place Order
| Page/Screen | Place Order |
| Application | Supplier System |
| Role | Supplier |
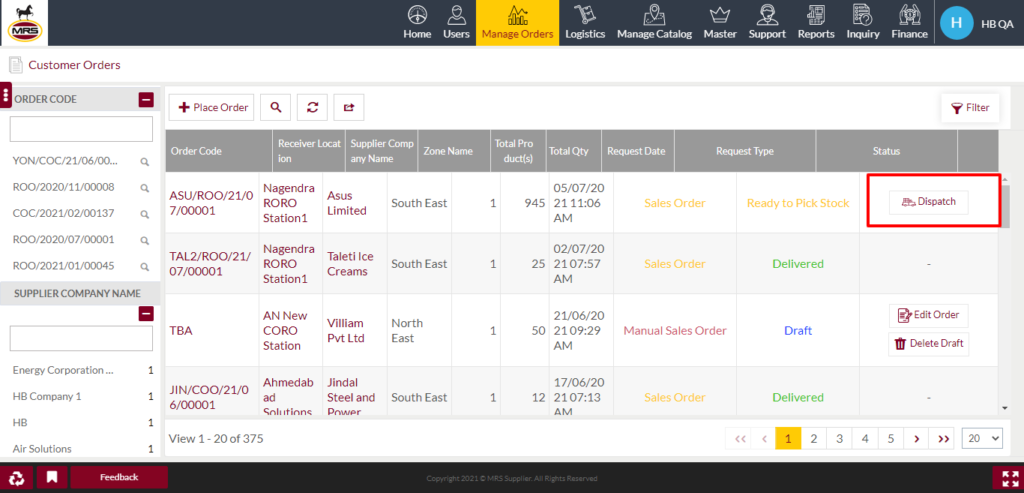
1.8 Orders in Supplier System
Once the order is synced to the supplier system then the status of the order shows as “Ready to Pick Stock”.
| Page/Screen | Customer Orders |
| Application | Supplier System |
| Role | Supplier |
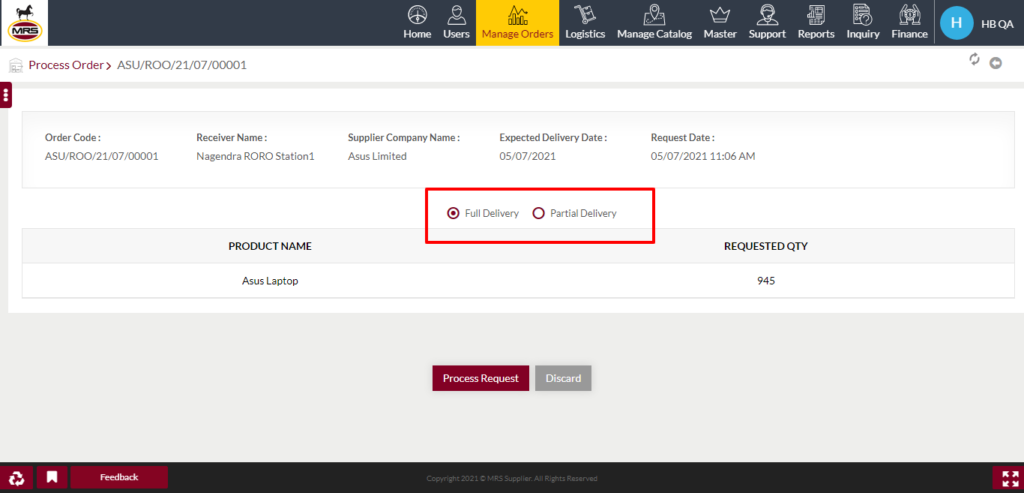
1.9 Dispatch Orders
Here supplier or MRS Admin can perform the dispatch the order. By clicking on the dispatch button in the customer orders page, system navigates to the delivery type selection whether the partial delivery or full delivery. If user chooses the partial delivery then user need to input the quantity of the product how many units the user is going to deliver.
If the user giving the partial delivery then the dispatch option will be displayed for the order. The partial dispatched quantity or the full order will be displayed in the schedule dispatch module.
Who can perform?
1. MRS Admin (Supplier System)
2. Supplier
3. Zone Admin
| Page/Screen | Dispatch Order |
| Application | Supplier System |
| Role | Supplier, Zone Admin |
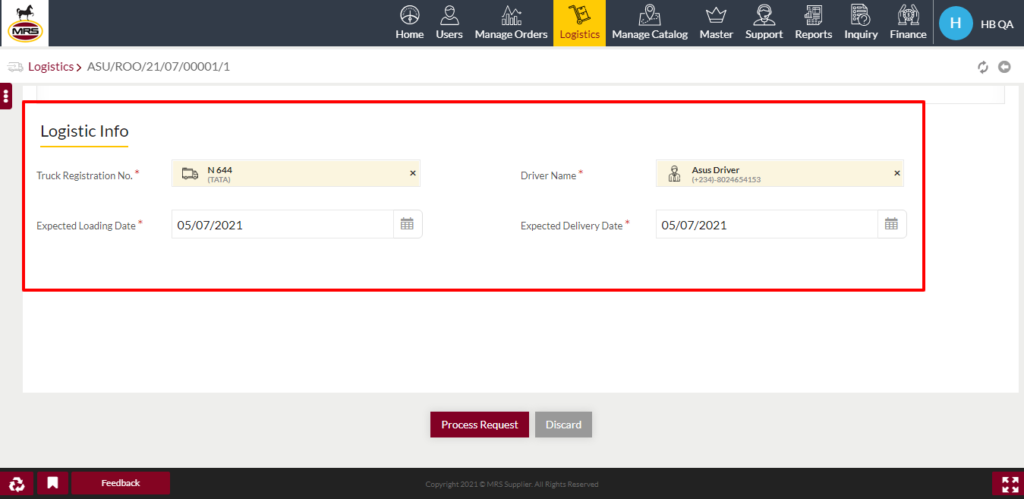
2.0 Schedule Dispatch
Under logistics menu schedule dispatch menu item will be there to schedule the dispatched quantity of the orders. In schedule dispatch page assign truck option will be displayed. By clicking on the assign truck button user navigates to the tuck and driver selection and also it shows to select the expected loading date and the expected delivery date.
Once the dispatch is scheduled and the user want to update truck/driver/ dates then user can update the details using the Re-assign Truck option.
Who can perform?
1. MRS Admin (Supplier System)
2. Supplier
3. Zone Admin
4. Logistic Admin
| Page/Screen | Schedule Order |
| Application | Supplier System |
| Role | Supplier, Zone Admin, Logistic Admin |
2.1 Delivery of Products by Driver
Once the schedule is dispatched then the assigned driver need to login in to the supplier application. Here the delivery process is having 2 types.
1. Short Delivery
2. Detail Delivery
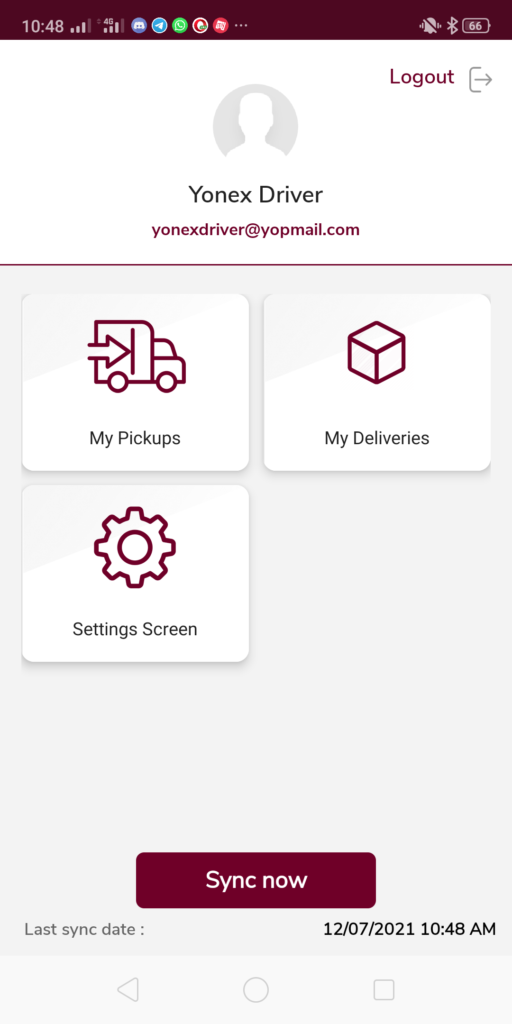
| Page/Screen | Home Screen |
| Application | Supplier Mobile App |
| Role | Driver |
If the supplier delivery process is short delivery then that supplier drivers will have only My Deliveries in the supplier application. If the supplier delivery process is detail delivery then that supplier drivers will have My Pickups and My Deliveries options
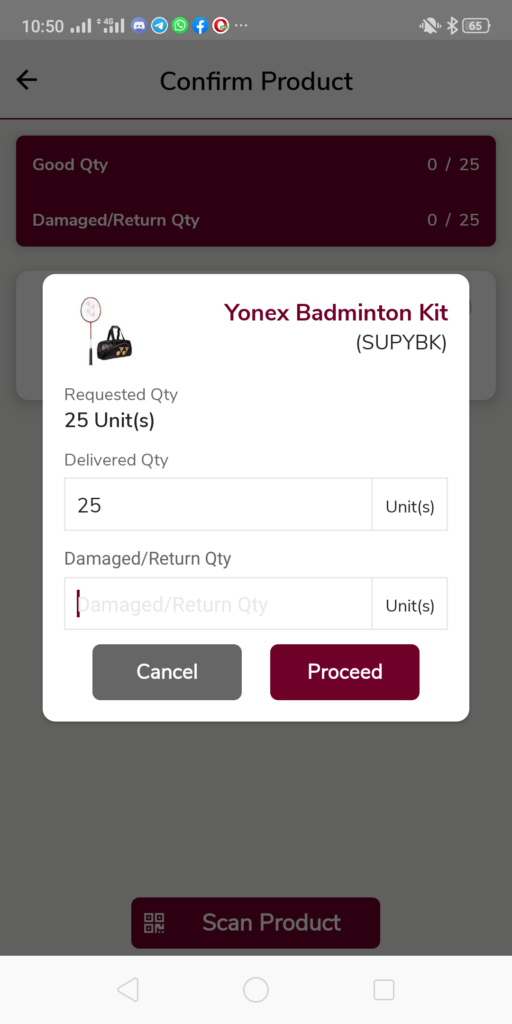
If the supplier delivery process is detail delivery then the driver need to take the pictures of the products while picking up from the supplier and also need to take the picture of the products at the destination while giving the delivery to the customer.
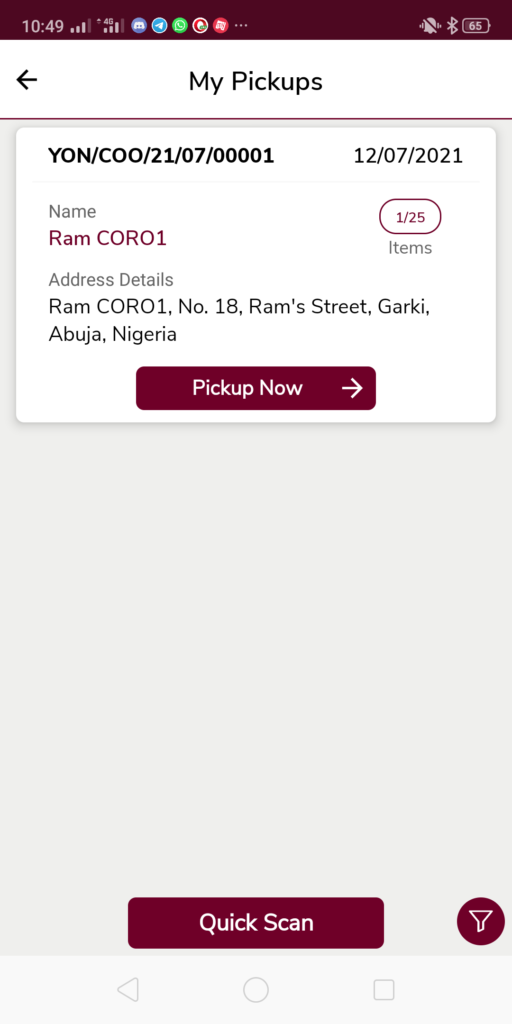
| Page/Screen | My Pickups |
| Application | Supplier Mobile App |
| Role | Driver |
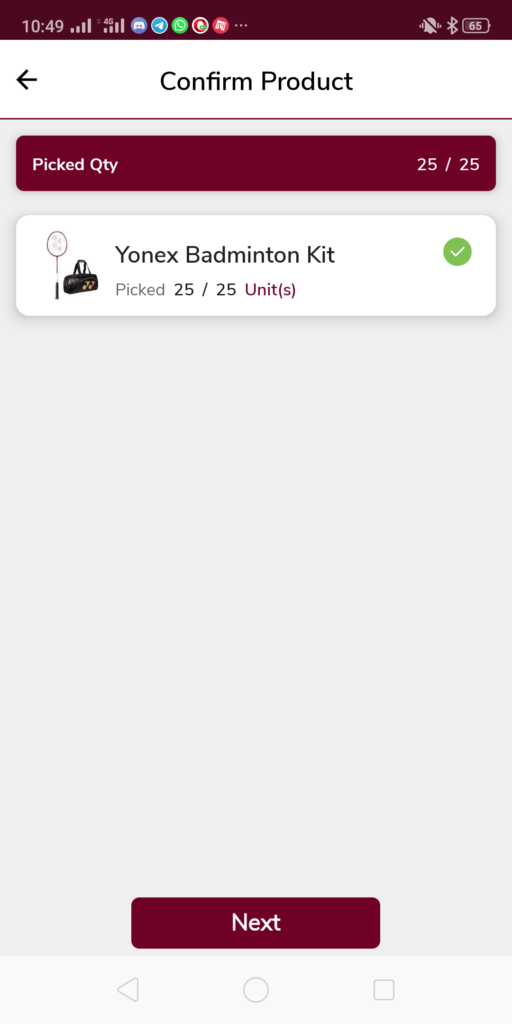
| Page/Screen | Confirm Product |
| Application | Supplier Mobile App |
| Role | Driver |

| Page/Screen | Confirm Pickup |
| Application | Supplier Mobile App |
| Role | Driver |
If the supplier delivery process is short delivery then the driver need to take the picture of the products while giving delivery at the destination.
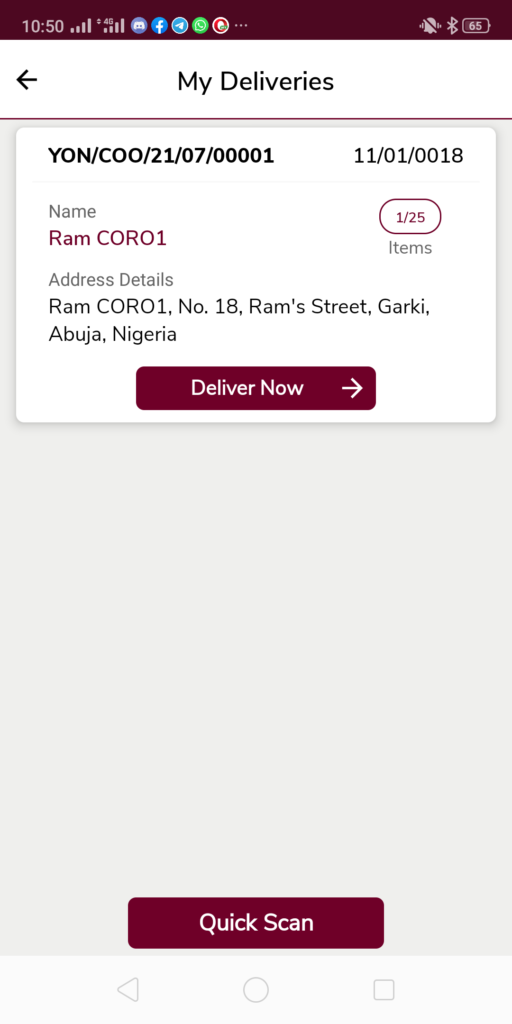
| Page/Screen | My Deliveries |
| Application | Supplier Mobile App |
| Role | Driver |

| Page/Screen | Product Delivery |
| Application | Supplier Mobile App |
| Role | Driver |

| Page/Screen | Select Receiver Name |
| Application | Supplier Mobile App |
| Role | Driver |
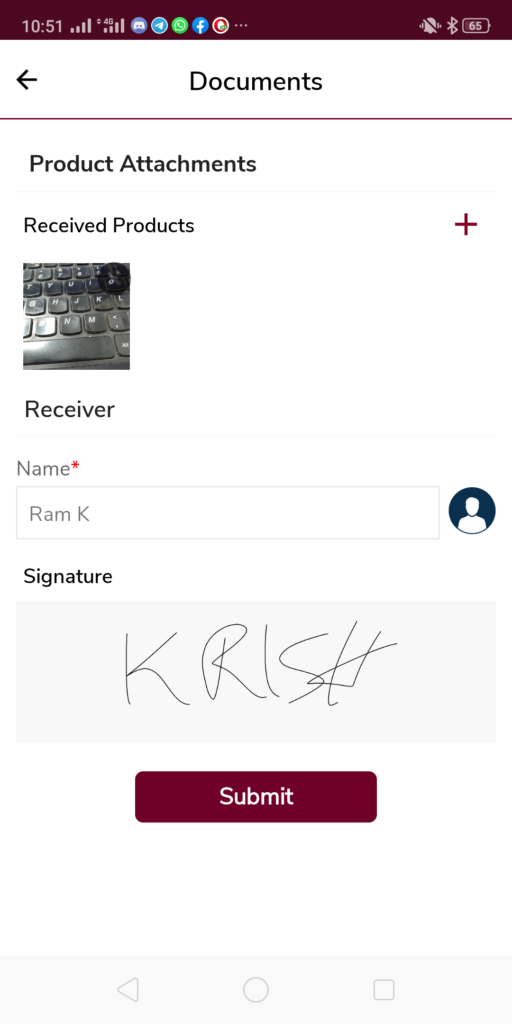
| Page/Screen | Delivery Documents |
| Application | Supplier Mobile App |
| Role | Driver |
Who can perform?
1. Driver
2.2 Order Completion
Once the delivery is given by the driver from the supplier application then there is no quantity is pending in the order then the status will be updated to Delivered and the status will be synced to the portal. If the order is having the pending quantity then the order status in the supplier system will be updated to the partial delivered and the stock inward request will be synced to the portal.
Once the order quantity is delivered partially or fully then the product stock at the station/shop will be updated based on the delivered quantity.
2.3 Invoice Generation for Supplier Products
For other supplier products invoice will be generated after performing the sales at the station/shop. Based on the supplier billing cycle the invoice will be generated for the performed sales during the billing cycle period.
For invoice generation there is an option in the supplier system for supplier specific. Product billing type is of 2 types.
1. Parent Product
2. Child Product
If the supplier product billing type is configured as the parent product then the invoice will be generated for the parent product. This calculates based on the number of child products present in the parent product. If the sales is performed to the equivalent to the parent product configured child products quantity then the invoice will be generated for the parent product. If the supplier billing type is configured as the child product then the invoice will be generated for the child products. This calculates the number of child products sales performed during the billing cycle.
Based on the generated invoice system will be debited the invoice amount from the customer’s wallet.
Who can perform?
- RORO Dealers
- CORO Dealers
- COCO Dealers
- Independent Dealers
- Distributor and Resellers

| Page/Screen | Sales |
| Application | Portal Customer App |
| Role | RORO Dealer, CORO Dealer, COCO Dealer, ID, D&R |
2.4 Payment Cycle for Supplier Product Invoice
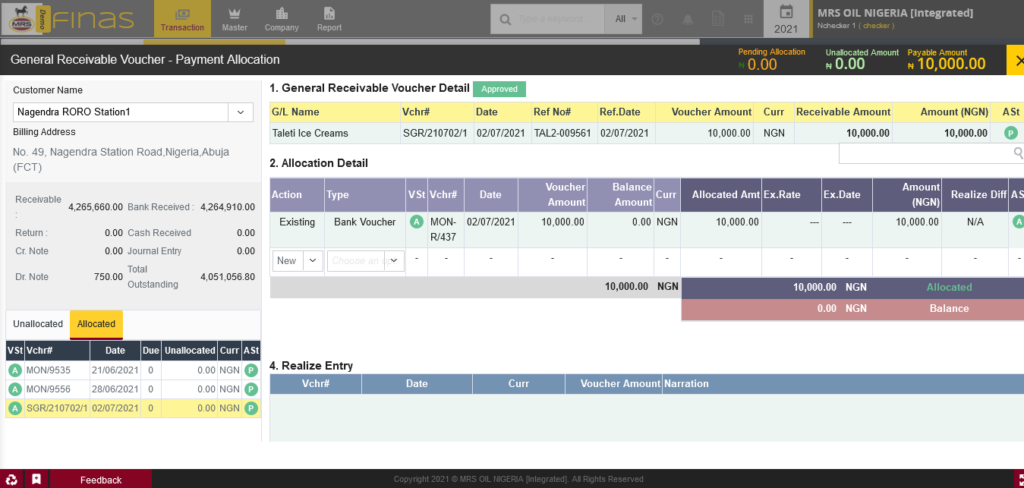
Once supplier product invoice generates then the dealer need to submit the payment request for that supplier. Once the payment request submitted by the dealer then finance team will review and allocate the payment request against the supplier invoice. User can allocate the payment receipt against invoice from the Other – Receivable Allocation. User can navigates to the Other – Receivable Allocation from Transaction menu Receivable sub menu and Receivable – Allocation. By clicking on the receivable allocation menu item user navigates to the receivable allocation listing. Here user can see the Other – Receivable Allocation tab by clicking on the tab system shows the supplier product invoices. By clicking on the pay button user can allocate the payment details which are submitted by the dealers.
Transaction > Receivable > Receivable – Allocation > Other- Receivable Allocation
Once the payment receipt is approved by the finance team then the invoice status will be updated to Paid.
| Page/Screen | Receivable Allocation |
| Application | FINAS System |
| Role | Checker / FINAS User |
2.5 Approval of Supplier Commission
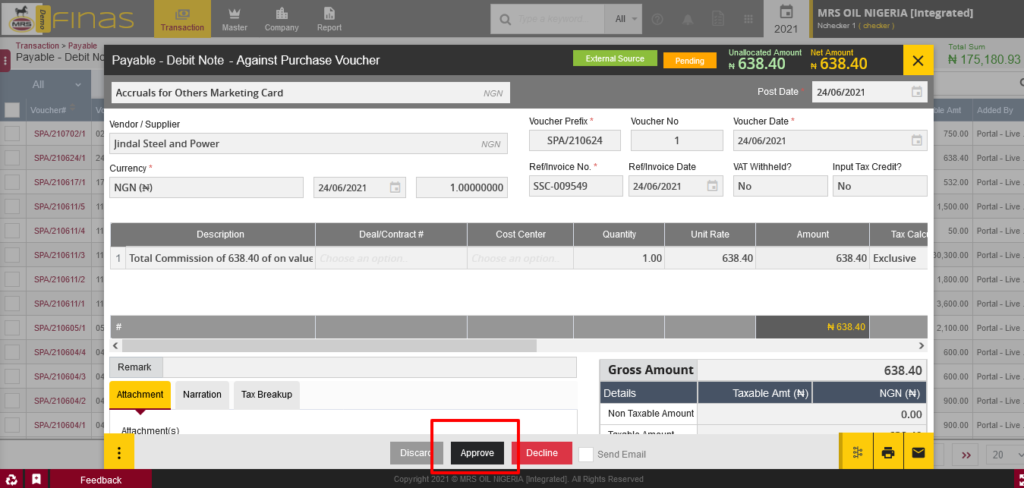
For the supplier product invoices which are generated then a MRS commission invoice will be generated against those supplier product invoices. Finance team will approve the commission voucher from the Payable debit note module. User can navigate from finance system Transaction menu payable sub menu and payable – debit note menu item. By clicking on the payable – debit note user navigates to the listing and from there by clicking on the voucher number then system shows option to approve the voucher.
Transaction > Payable > Payable – Debit Note
Generally these vouchers will be auto approved, if the auto approval setting is disabled then user need to approve the voucher manually. Once finance team approves the debit note then the status will be synced to the portal system and commission invoice status will be updated to Paid
| Page/Screen | Payable – Debit Note |
| Application | FINAS System |
| Role | Checker / FINAS User |
2.6 Update of Vendor Invoice Status
When finance team approves the commission voucher from payable – debit note then the vendor invoice status will be updated to the Partially Paid. After that finance team will create a cash voucher/bank voucher/any similar entry to allocate the payment for the supplier. Once MRS receives the payment from the dealer then MRS will pay the amount to the supplier. Finance team will allocate the respective payment details from the cross – payable allocation. User can navigate to cross – payable allocation from Transaction menu Payable sub menu Payable Allocation menu item.
Transaction > Payable > Payable Allocation
By clicking on the Payable Allocation menu item user navigates to the payable allocation listing, from here user can see the Cross – Payable Allocation tab. By clicking on the tab system shows the payable amount against the supplier product invoices. By clicking on the pay button user can allocate the payment details which are created/submitted earlier or user can create a new vouchers from the pay popup.
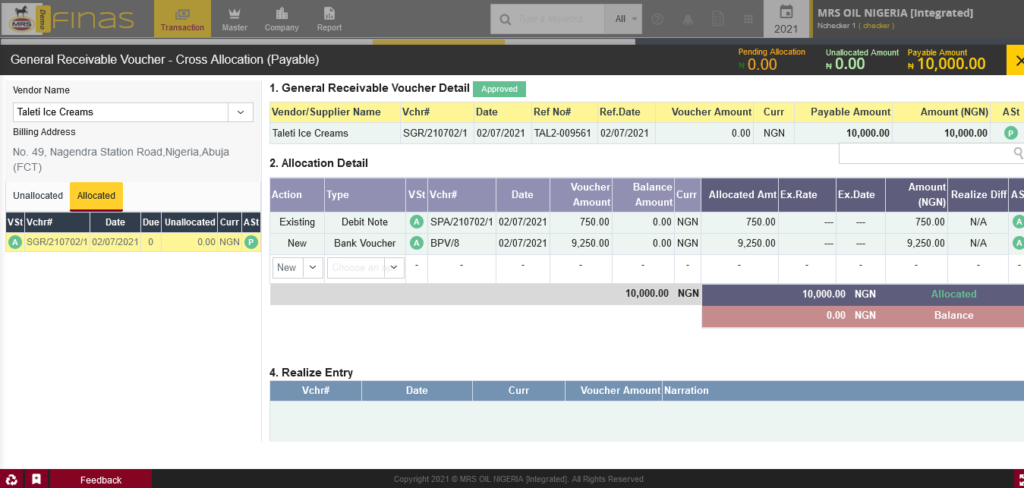
| Page/Screen | Payable – Allocation |
| Application | FINAS System |
| Role | Checker / FINAS User |
2.7 Supplier Product Selling Price Update
The other supplier products selling price is coming from the supplier system only. That price is considered as the maximum retail price. Here if require at specific stations the selling price of the other supplier can be reduced by the MRS Admin from the supplier selling price module. From this module MRS Admin can update the selling price of the specific zone or the specific retail station. But the updated selling price will not be the greater than the maximum retail price which is coming from the supplier system. The selling price is always the less than or equal to the maximum retail price which is coming from the supplier system.
Who can perform?
1. MRS Admin (Portal)
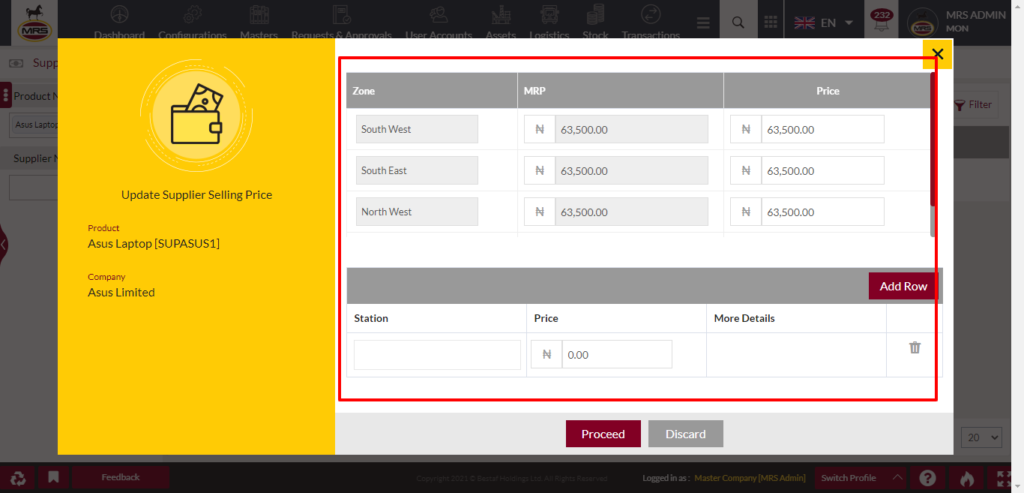
| Page/Screen | Supplier Selling Price |
| Application | Portal Web |
| Role | MRS Admin |